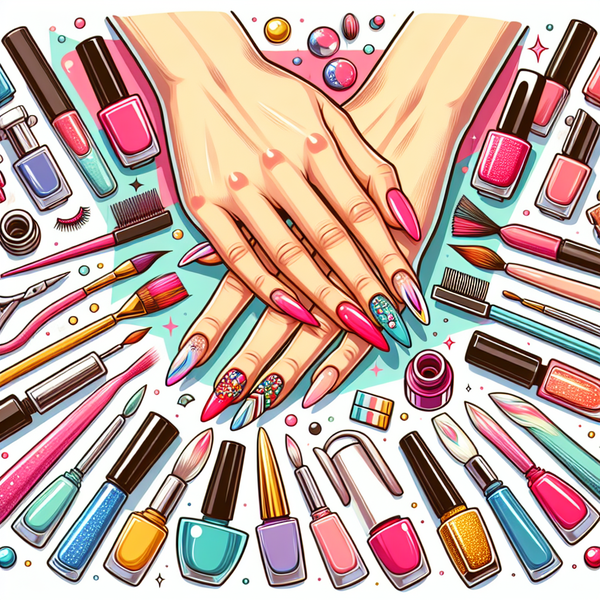
DIY nail art ideas that look pro without a salon bill
You know that feeling when your nails look fresh enough to clack on a coffee cup and make a statement. You do not need a pricey salon appointment for that. If you crave DIY nail art ideas and at home manicure tips, this friendly guide shows you how to create professional looking nails at home with easy steps, budget nail art hacks, and even a gel look without UV. We will cover prep that makes polish last, simple tools you already own, easy nail designs anyone can do, and a bunch of fixes for common mistakes.
By the end, you will have a personal playbook for modern, clean, and chic nails that hold up through meetings, workouts, and everything in between.
At home manicure tips that build a flawless base
Every great design starts with solid prep. A pro never skips base work, and that is why your at home manicure should begin before your first swipe of color. Here is how to set your nails up for long wear and a smooth finish. These steps also help any look feel salon level.
Clean and dry nails. Wash hands, then wipe nails with a cotton pad and a little non acetone remover or alcohol. This clears oil that can make polish lift. Dry your hands well; water hanging out under the nail can create bubbles later.
Shape with intent. Choose a shape that matches your lifestyle: round for low maintenance, squoval for a modern look, soft almond for a little glam. File in one direction to avoid splits. If you love a straight French tip, keep the free edge even and symmetrical.
Deal with cuticles gently. Soften them in warm water for two minutes. Push back with a wooden stick. Do not cut living skin. If you have hangnails, snip only the loose bits. A dot of cuticle remover helps dissolve dead tissue for a cleaner edge.
Buff very lightly. A quick pass with a fine buffer smooths ridges so your color lies flat. Less is more, because over buffing weakens the nail. If you want a thicker, fuller look, save the plumping for top coat, not the buffing block.
Dehydrate and prime. Wipe nails with alcohol again, then use a thin base coat. Some base coats are ridge filling, some are sticky for better grip, some help with peeling or staining. Choose one that suits your nail type, because the right base is a secret weapon for professional looking nails at home.
Why it matters: lacquer clings better to clean, oil free nails; a filled and level surface hides imperfections; and a well chosen base lets color self level like glass. These steps make any nail art, even easy nail designs, look crisp and deliberate rather than rushed.
Budget nail art hacks and easy nail designs you can master
Now for the fun part. Nail art does not have to be complicated, time consuming, or expensive. With a few tricks and smart tools, you can nail designs that look hard but are actually a breeze. Below are three focused areas: tool swaps that save money, foolproof techniques for clean lines, and ways to get a gel look without UV.
Subsection 1: Simple tool swaps for small budgets
Great news. You do not need a drawer full of salon tools to start. Plenty of household items do the job.
Dotting tool alternatives:
1. Bobbi pin round tip for large dots and daisies.
2. Toothpick for tiny accents and constellation specks.
3. Mechanical pencil tip (empty) for medium dots with control.
Line work on a budget:
1. Striping tape is cheap and powerful. Use it as a stencil for perfect lines or leave it on as metallic accents.
2. An old eyeliner brush cleansed with soap becomes a thin liner brush for swirls and waves.
3. Scissors plus painter tape can create triangle and chevron stickers in seconds.
Gradient secrets without a kit:
1. Makeup sponge for ombre. Dab polish on the sponge in stripes, then bounce on the nail. Clean up with a brush dipped in remover.
2. Paper towel dab for a textured cloud tip that reads artsy and soft.
Upgrade your clean up game:
1. Take a tiny angled brush and dip in remover to sharpen smile lines and sidewalls.
2. If you do not own a brush, wrap a bit of cotton around a toothpick for precise cleanup near the cuticle.
Quick anecdote: The first time I tried a checkerboard, I almost gave up after a wobbly first nail. Then I switched to painter tape cut into small squares and pressed them down firmly. Boom, crisp boxes. The whole look went from messy to graphic in minutes. Lesson learned: the right stencil does 80 percent of the work for you.
Subsection 2: Foolproof techniques for clean, modern nail art
When you want professional looking nails at home, go for styles that are high impact with simple steps. These DIY nail art ideas are beginner friendly and look modern any season.
Side French, also called micro French on the edge:
1. Paint a sheer nude base and let it dry.
2. Use striping tape to mark a slim arc along one side of the nail.
3. Fill the arc with a bright color or metallic. Remove tape while the polish is wet. Seal with top coat.
Negative space half moon:
1. Place a small round sticker near the cuticle on a bare or sheer base.
2. Paint your color over it, then lift the sticker to reveal a clean crescent.
3. Looks luxe with deep green, black cherry, or navy. Finish with a glossy top.
Two tone color block:
1. Paint the whole nail with Color A and let it dry for at least 15 minutes.
2. Apply painter tape on a diagonal, then paint Color B across the free area.
3. Remove tape while wet. Add a thin line of metallic where the colors meet if you want a polished finish.
Minimalist dots and dashes:
1. On a nude base, place one dot near the cuticle or one dash near the tip.
2. Repeat on each nail with slight variation. This is the easiest nail designs approach that still looks editorial.
Soft skittle set:
1. Choose five colors in one palette, like dusty roses or cool greys.
2. Paint each nail a different shade. It feels styled without any art at all.
Micro chrome accent:
1. Paint a solid cream base.
2. Add a chrome stripe down the center with chrome polish or a metallic striping tape.
3. One shiny stripe makes nails look longer and sleeker.
Swirl nails with a liner brush:
1. Mix a drop of polish with clear top coat to thin it slightly.
2. Load a thin brush and draw S shapes that start and end off the nail edge.
3. Use two or three shades in the same family for a cohesive look.
Checker French tip:
1. Paint tips with a light shade using a curve guide.
2. After it dries, add tiny squares in a darker color across the tip. Seal with top coat.
Pro move for crisp lines: float the polish. Instead of pressing the brush hard, hover it and let surface tension do the work. This trick prevents streaks and gives a clean edge on curves.
Subsection 3: The gel look without UV, plus wear time boosters
You can get a glassy, cushiony finish without a lamp. The secret is in formulas and layer strategy. Here is how to mimic that gel look without UV and keep chips away.
Choose a gel effect system. Many brands sell long wear creams and top coats that deliver a plump finish without a lamp. Look for terms like gel effect, gel couture style, or long wear shine. Pair the matching color and top coat from the same line for best chemistry.
Layer thin, but build volume. Two thin coats of color beat one thick coat every time. Add a plumping top coat that self levels. If you want extra cushion, let the first top coat dry, then add a second. Wrap the tip each time by running the brush along the free edge. This is a key salon habit that slows tip wear.
Freeze the surface, then let it cure. Quick dry drops speed up the set on top, which helps prevent dents. After 10 minutes, avoid hot water for an hour so layers finish curing. Patience pays off in shine and longevity.
Oil is your best friend. Daily cuticle oil keeps nails flexible so polish is less likely to crack. Hydrated nail plates also look smoother, which enhances that glassy gel vibe.
Common mistakes to avoid when chasing that pro finish:
1. Skipping base coat. Color can stain and chip fast without a proper base.
2. Shaking your bottle. This traps bubbles. Roll the bottle between your palms instead.
3. Flooding the cuticle. Start your brush one hairline away from the skin. You can push the polish up to the line without flooding.
4. Thick coats. They wrinkle and dent. Thin layers self level and dry smoother.
5. Neglecting the free edge. Not wrapping tips is a top reason for early chips.
6. Using hand lotion right before painting. Oils break the bond. Moisturize after your manicure is dry.
7. Skipping cleanup. Crisp edges make even simple looks read professional.
Application tips you can apply today
Keep these practical steps handy as a quick checklist. They combine at home manicure tips with budget nail art hacks, and they work whether you are new or already confident with a brush.
Prep and prime:
1. Wash, dry, and dehydrate nails with alcohol or remover.
2. Lightly buff if you have ridges. Dust off with a clean brush.
3. Apply a base coat tailored to your nail type.
Choose the right design for your time window:
1. 10 minutes: skittle set in one palette or single dot accents.
2. 20 minutes: micro French or negative space moon with stickers.
3. 30 minutes: color block with tape or soft ombre with a sponge.
Use smart shortcuts:
1. Create your own stencils from painter tape for perfect lines.
2. Use a bobbi pin for clean dots and daisies.
3. Thin polish with a drop of top coat for smoother swirl lines.
Polish like a pro:
1. Wipe one side of the brush on the bottle neck so you have the right amount of polish.
2. Use the three stroke method: one down the center, then one on each side.
3. Cap the free edge with every layer, including top coat.
Fix mistakes fast:
1. Keep a tiny clean up brush dipped in remover for sidewalls and cuticle line.
2. Nicks happen. Press a drop of top coat to level the area, let it set, then add a thin coat of color and top again.
Boost wear and shine:
1. Add a fresh layer of top coat on day two or three.
2. Use cuticle oil nightly to prevent dryness and chips.
3. Wear gloves for dishwashing and cleaning to protect your finish.
Design menu for every skill level
Want specific DIY nail art ideas you can rotate through the month. Mix and match these sets. They all photograph beautifully and fit any season with color swaps.
Beginner friendly:
1. Single dot accent: nude base, black dot near the cuticle on each nail.
2. Micro French: skinny white or neon line just at the tip.
3. Skittle neutrals: five shades of beige to cocoa across your hand.
4. Glitter fade: dense glitter at the tip, fade halfway down with a sponge.
5. Half dip: tape the nail halfway and paint the tip in a bold cream.
Intermediate options:
1. Side stripe: metallic stripe tape along one edge over a cream base.
2. Wavy duo: two parallel S curves in matching tones across a sheer base.
3. Checker tip: mini squares across the tip in two colors.
4. Color block triangles: two overlapping triangles using tape guides.
5. Negative space heart: use a tiny heart sticker near the cuticle, paint over, then remove.
Advanced but fast with tape and tools:
1. Ombre sunset: coral to magenta with a makeup sponge, finish with glossy top.
2. Marble cheat: drop white and grey on a sandwich bag, swirl gently, press the nail onto the pattern, then top coat.
3. Micro florals: dots for petals with a toothpick and a tiny green dash for leaves.
4. Grid lines: striping tape to create a fine grid, remove to leave crisp lines over a pastel base.
5. Side French duet: micro tip on both sidewalls in two colors with a bare center.
Color theory that flatters your skin tone and shape
A small color tweak can make designs pop. Think in terms of contrast, undertone, and lengthening effects.
Contrast: Light tips on deeper bases read crisp. Dark tips on nude bases look edgy. Metallic over creams add instant dimension.
Undertone: Cool skin glows with blue red, berry, and navy. Warm skin sings with terracotta, olive, and sunset tones. Neutral skin carries both, especially dusty shades.
Lengthening: Vertical details like a center stripe or slim swirl make short nails feel longer. A micro French tip also stretches the look of the nail.
Care habits that keep your polish chip free
Longevity is part art, part routine. Here are habits that help every manicure last longer and keep that gel like shine intact.
1. Oil daily. Dry nails crack polish. Oil keeps nails flexible and resilient.
2. Top coat refresh. A thin layer every couple of days renews the shield and shine.
3. Gentle filing. If an edge lifts, file it smooth and add top coat instead of peeling.
4. Avoid steam early on. Hot showers right after painting can bubble layers. Wait a bit.
5. Glove up. Cleaning products and long soaks wear down polish fast. Gloves protect your work.
6. Store polish smart. Keep bottles somewhere cool and away from sun so they maintain the right texture.
Troubleshooting guide for flawless results
Even with solid technique, stuff happens. Here is how to fix the most common hiccups fast.
Bubbles in polish:
Cause: Shaking bottles or painting on damp nails.
Fix: Roll bottles to mix. Wipe nails with alcohol and wait a minute before painting. Use thinner layers.
Streaky sheer polish:
Cause: Not enough product on the brush or pressing too hard.
Fix: Load the brush, float it lightly, and allow self leveling. Add a ridge filling base under sheer colors.
Smudges and dents:
Cause: Thick coats or touching things too soon.
Fix: Press a drop of top coat over the dent to smooth it. After it sets, add another thin top layer.
Tip wear in a day:
Cause: Skipping the wrap. Lots of typing or heavy chores.
Fix: Cap the free edge with every layer. Add a thin top coat on day two.
Polish lifting at the cuticle:
Cause: Oil left on the nail or flooding the skin.
Fix: Dehydrate with alcohol. Start a hairline away from the cuticle and push up, do not start on the skin.
Safety and comfort tips you should know
Your nails should look amazing and feel healthy. Keep these basics in mind.
1. Ventilate when using remover or strong polish. Fresh air is your friend.
2. Avoid over filing. It can cause peeling and sensitivity.
3. Patch test new products if you have sensitive skin.
4. Take polish breaks if nails feel thin. A week of oil and a hydrating base helps them bounce back.
Wrap up: your pro playbook for nails on a budget
You can create professional looking nails at home without heavy tools, pricey gels, or hours of trial and error. Prep right, pick designs that do more with less, use budget nail art hacks like tape and bobbi pins, and seal everything with a long wear, plush top coat for that gel look without UV. Keep your toolkit simple, your layers thin, and your edges clean. The result is a set of nails that look intentional, modern, and salon worthy every time.
Ready to try. Choose one of the easy nail designs above, set a 20 minute timer, and treat yourself to a calm, creative break. Your coffee cup clack will thank you.
Meta Description: DIY nail art ideas and at home manicure tips for professional looking nails at home. Try budget nail art hacks and get a gel look without UV, fast.