Anti-aging makeup tips: The Makeup Trick That Makes Anyone Look 10 Years Younger
Here is a little beauty secret that feels like magic. One small shift in where you place light and color can lift your entire face in minutes. No needles. No filters. Just smart placement. In this guide, I will break down this simple lift method so you can use it today. We will cover anti-aging makeup tips, makeup for aging skin, and how to use contour and highlight in a way that looks fresh and natural. If you want makeup to look younger without heavy layers, this is for you.
We will start with a quick overview of why this works. Then you will learn the exact steps for the Soft Lift Map, a friendly way to do contouring for mature skin. I will show you how to choose the best foundation for mature skin, where to place light, how to carve soft shadows, and which youthful makeup tricks always help. By the end, you will have a simple routine that flatters your features, respects your skin, and reads as you, just brighter.
Makeup to look younger without surgery: why this lift method works
Aging changes where our face reflects light. As volume shifts, we get shadows under the eyes, at the sides of the nose, near the mouth, and under the cheekbones. Bright areas move lower, and everything can look a bit downturned. The trick is to put light back where it lifts and shadows where they slim, while keeping texture soft. That is the heart of this method.
Think of your face like a map. High points catch light: tops of the cheeks, brow bone, center of the forehead, and inner corners near the nose. Low points hold shadow: just under the cheekbone, the edges of the jaw, and the sides of the nose. When we place product with care, we nudge those highs and lows into a more youthful balance. Makeup for aging skin works best when it follows this rule: light cleans, shadow shapes, and everything blends like a whisper.
This is not about drastic lines. It is about soft lift. Why soft? Because skin after 35 loves creamier textures and fewer harsh edges. Heavy matte layers can sit in lines and flatten the face. Sheer, buildable layers give glow without glare. That is why the Soft Lift Map centers on placement, not packing on product. It works across ages, skin tones, and face shapes because it is based on how light behaves, not on trends.
Here is what you will get from this approach:
- A fresher eye area without caking on concealer
- Slimmer jaw and cheek area without stripes
- A calm glow that looks like skin, not like makeup
- Speed, since you can do this in under 10 minutes once you learn the map
Now let us move into the how.
Contouring for mature skin made easy: the Soft Lift Map
The Soft Lift Map is one simple trick with three parts: base, light, and shadow. Think of it as sketching with glow. A gentle base evens tone. Light placements lift. Soft shadows tuck. Then a touch of blush and brow structure ties it all together. Below is the full breakdown, with practical youthful makeup tricks added in.
Part 1: Build a skin-like base with the best foundation for mature skin
Most of the lift comes later, but the base makes it smooth and believable. The best foundation for mature skin is light to medium coverage with a satin finish. Look for flexible formulas that move with facial expression. A serum or hydrating base often works well, especially if your skin feels dry.
Prep:
- Hydrate first. Use a light moisturizer that sinks in and gives slip. This keeps product from grabbing onto dry patches and fine lines.
- If you like, add a thin blurring primer only where pores show, such as the center of the face. Avoid heavy silicone layers that can pill under cream products.
Shade and undertone:
- Match your face to your neck, not to the brightest part of your cheek. This avoids a floating mask effect.
- If your skin has warmth, a neutral or slightly yellow undertone can calm redness. If your skin is cool, a neutral or rosy undertone often looks most natural.
Application:
- Use a small amount of foundation first. Dot it on the center of the face: sides of the nose, around the mouth, and a touch on the forehead and chin. Blend outward. Leave the outer edges of the face lighter so it looks like real skin.
- Spot conceal after foundation so you do not over-apply. Tap a cream concealer only on redness or marks. This saves product and keeps texture soft.
Why this helps:
- A thin, even base lets light and shadow do the heavy lifting. It knocks back uneven tone without erasing the dimension that makes faces look young and real.
Part 2: Place light to lift key features
This is the center of the trick, and the most important part of anti-aging makeup tips in general. You will use a brightening concealer or a sheer highlighting pen. Aim for a shade that is close to your skin tone, maybe one half shade lighter. Avoid white or frosty shimmer. We want lift, not glare.
Here is the Soft Lift Map for light:
- Outer eye corner: Place a small V of light at the outer corner of the eye, just above the crow lines. Blend it up and out toward the tail of the brow. This flips the eye upward and gives a rested look without tugging on lines.
- Inner eye corner and side of nose: Add a small dot at the inner corner, then a thin line along the shadow at the side of the nose. Blend it out. This opens the eye and reduces the look of tired grooves.
- Nasolabial shadow: Smile gently, then relax. Tap a tiny bit of light only into the shadowed groove beside the nostril, not on the fold itself. Blend well. This brightens without making the area look puffy.
- Marionette area: If the corners of the mouth tilt down, place a pin dot of light just above the corner, then blend out toward the cheek. This creates an upward look.
- Brow lift dot: Add a small dot of light under the highest point of the brow, then blend. You can also place a tiny touch above the tail of the brow to draw the eye upward.
- Center lift: For a gentle vertical lift, tap a small amount of light between the brows and at the center of the chin. Keep this sheer.
Blend by tapping with a clean finger, a soft brush, or a damp sponge. You should see a gentle brightening, not a stark highlight. This is what makes makeup to look younger feel believable. It is subtle but powerful.
Part 3: Add soft shadow and high blush for a natural lift
For contouring for mature skin, cream is your friend. Look for a contour shade that is neutral to cool, one to two shades deeper than your skin tone. Avoid harsh, deep stripes. You are sketching, not sculpting a statue.
Shadow placements for the Soft Lift Map:
- Cheek contour: Smile slightly to find the top of your cheek. Place contour just above the hollow, not inside it. Blend up toward the top of the ear. Keeping it higher makes cheeks look lifted.
- Jaw softening: Tap a tiny amount under the jaw and blend down the neck. This defines without creating heavy lines.
- Nose sides: If you want, add a whisper of contour along the sides of the nose, starting near the inner brow. Blend so there are no hard lines.
Now blush for youth:
- Use a cream blush with a satin finish in a fresh tone that suits your skin. Warm peach, soft rose, or berry for deeper skin tones are great tools.
- Place blush high on the outer cheek and sweep it slightly toward the temple. Think up and out. This adds an instant youthful lift. If you place blush too low or too close to the nose, it can drag the face down.
Strategic glow:
- If you like a highlight, keep it soft and not glittery. Tap a tiny amount on the top of the cheek, above where you put blush, then blend into the temple. Avoid heavy shimmer near crow lines or textured areas.
Brows, eyes, and lips that support the lift
Brows frame the story. A gentle, feathery brow with a soft arch brings instant structure. Use a thin pencil with hair-like strokes and a clear gel to brush hairs up and out. Do not over-darken. Softer color can read more natural and still define the shape.
For eyes, focus on lift and brightness:
- Tightline the upper lash line with a deep brown, charcoal, or plum. This thickens the look of lashes without hard edges.
- Curl lashes and use a lifting mascara, focusing on the outer third. Fan lashes outward for a cat-eye lift without a heavy wing.
- If you like shadow, keep it simple. A soft matte in the crease, lifted slightly above your natural crease line, helps open the eye. A hint of sheen at the lid center adds light but avoid chunky glitter.
Lips love moisture and shape. Choose a creamy lipstick or balm stain in your natural-lip-plus-one shade. Use a liner that matches your lip tone to lift the corners slightly by tracing just above the outer corner, then blending. Matte formulas can cling to lines. A satin finish plumps and looks modern.
Common mistakes and how to fix them
- Too much powder: Baking can settle into lines. Instead, use a small brush to set only where you crease, like under the eyes and sides of the nose. A soft-focus powder works better than a flat matte for makeup for aging skin.
- Wrong undertone: If your base looks dull or gray, the undertone may be off. A small bump of warmth can restore life. If it looks too yellow or orange, step back to neutral.
- Heavy concealer under the eye: Thick layers can crease and age the area. Use less and focus on targeted brightening. The outer eye corner light trick often does more than packing on product under the eye.
- Deep contour stripes: This can carve the face in a way that reads harsh. Choose a sheerer formula and blend up, not down.
- Glitter highlight in textured areas: Sparkle can shout look at this texture. Choose a soft sheen and place it carefully above the lines, not on top of them.
- Lower lash line overload: Heavy liner below the eye can drag features down. Keep the lower lash line soft or clean, and put lift on the top lashes.
Why this feels like one trick, not 20 steps
You are not learning a full glam routine. You are learning one map: place light in five lift points, place shadow just above the hollow, and sweep blush high. That is the trick. The rest is just blending and choosing the right textures for your skin. With practice, you will do it on autopilot.
Quick step by step to try now
Here is a simple routine you can do in 7 to 10 minutes. It ties together anti-aging makeup tips, youthful makeup tricks, and the best choices for makeup for aging skin.
1) Prep and base
- Moisturize and let it set for one minute.
- Apply a small amount of a hydrating, satin foundation. This should be your best foundation for mature skin pick. Blend from the center out.
- Spot conceal where needed.
2) Light placements for lift
- Tap light at the outer eye corner, blend up toward the brow tail.
- Brighten the inner corner and side of the nose.
- Dot light in the shadow beside the nostril and blend.
- Add a tiny dot above the mouth corners if needed.
- Add a soft dot under the brow arch and blend.
3) Soft shadow for shape
- Sweep a sheer cream contour just above the cheek hollow and blend up.
- Tap a touch under the jaw and blend down the neck.
- Optional soft nose sides, blended well.
4) High blush and glow
- Place cream blush high on the outer cheeks and flick it toward the temple.
- Tap a soft, non-glitter highlight above the blush if you like.
5) Eyes and brows
- Brush brows up, fill sparse spots with light strokes, set with gel.
- Tightline the upper lash line. Curl lashes and apply mascara with extra focus on the outer third.
6) Lips
- Line softly with a lip-tone pencil. Fill with a creamy satin or balm stain in a fresh tone.
7) Set with intention
- Press a small amount of blurring powder on the sides of the nose, under the eyes, and the center of the forehead. Leave the high points dewy for a youthful look.
Extra pro-level tweaks that anyone can do
- Mix foundation with a drop of moisturizer on textured zones. This keeps the finish flexible and kind to lines.
- Use two concealers: a peachy corrector only where you see blue or purple, and a skin-tone concealer to blend it into your base. Less product, better result.
- Map your blush to your eye. Place the highest point of blush under the outer end of the brow tail. This cue keeps blush up where it lifts.
- Switch black liner to deep brown, plum, or navy. These tones soften without losing definition.
- Choose a lip color with a hint of brightness. A touch of coral, rose, or berry brings life to the face more than a very nude tone that can wash you out.
- Mist skin with a micro-fine setting spray at the end. Press it in with a sponge to meld layers together. This makes even a quick routine look seamless.
How to choose the best foundation for mature skin
Texture first. A flexible, hydrating formula is kinder to lines. Coverage should be enough to even tone, not erase every freckle. Finish should be satin or natural, not flat matte or high shine. If you have oilier skin, use a natural finish and set where you need it, not all over.
Test in daylight. Swipe three stripes on the jaw. The shade that disappears into your neck is the one to pick. If none vanish, adjust your undertone choice and try again. Remember, a tiny mismatch can look bigger once it covers your full face.
Apply in thin layers. A little can do a lot. Let each layer set before adding more, especially around the nose and mouth where movement happens all day.
Pair it with smart setting steps. Set only where you crease. If you need more longevity, use a light dusting of powder on a puff and press, do not swipe. Reserve the glow for the high points of the face and you will get that makeup to look younger effect every time.
What to do based on your skin type
Dry:
- Use a richer moisturizer and a creamy foundation. Avoid heavy powder. Opt for cream blush and contour.
Normal to combination:
- Use a satin base and set the T-zone. Keep cheeks dewy for a healthy lift.
Oily:
- Use a natural finish foundation and a thin layer of mattifying primer only where you shine. Set the center with a micro-fine powder but keep outer cheeks lighter to avoid a flat look.
Texture or lines:
- Choose thin layers and avoid thick, flat matte coverage. Place highlight above lines, not on top of them. Tap, do not drag, when you blend.
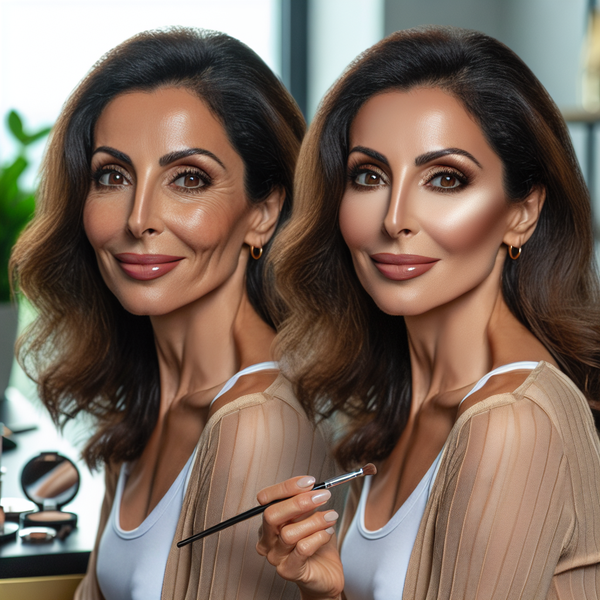
Real world example of the Soft Lift Map
Last weekend, I tried this on a friend before brunch. We did a tiny V of light at the outer eye, a tap at the inner corner, and a little brightening beside the nostril. Then a light contour just above the cheek hollow and blush high toward the temple. Brows up, top lash tightline, rosy balm. She looked clear eyed and lifted in under eight minutes. The best part was that it did not look like makeup at all. It looked like sleep and good lighting.
Key takeaways you can use today
- One map, many faces: Place light at lift points and shadow just above the hollow. It works on every face because it follows light, not trends.
- Texture wins: Creamy, flexible products sit better on skin and look more youthful than thick matte layers.
- Placement over product: You do not need a drawer full of items. A good base, a brightener, a contour, a blush, and a lip that suits you are enough.
- Set with care: Powder only where you crease. Keep high points fresh for that youthful bounce.
- Practice makes quick: Try it three times. Your hands will learn the map, and it becomes a five minute habit.
Conclusion: the no surgery lift you can do anytime
If you want a fast refresh that reads as natural, the Soft Lift Map delivers. Strategic brightening at the outer and inner corners, soft shading above the cheek hollow, and high, fresh blush combine to lift the whole face. Pair that with the best foundation for mature skin and gentle textures, and you get makeup to look younger that still looks like you.
This is the rare trick that respects real skin. It is kind to lines, easy to learn, and quick to repeat. Use these anti-aging makeup tips today, pass them to a friend, and enjoy that subtle wow in the mirror. No surgery, no stress, just smart placement and soft blending.
Meta Description: Discover anti-aging makeup tips with the Soft Lift Map, a simple placement trick using light and contour to create makeup to look younger, plus advice on the best foundation for mature skin and contouring for mature skin.